

We continue to acquaint you with new models of photopolymer 3D printers from the company Phrozen. In just a few years this company has become one of the leaders in the production of photopolymer printers for almost any task. We already have a lot of reviews on our channel, both on their printers and related equipment. Today we want to talk about the model with the largest printing area and at the same time with a very high resolution, the Phrozen Sonic Mega 8K 3D printer.
As usual, let’s start with the unpacking and specifications. Despite its impressive size, the printer, like its kind, comes fully assembled and ready to work in a large and heavy box.

Getting and installing the printer yourself is quite realistic, but quite difficult. It is advisable to do it together, because it weighs neither more nor less than 35 kilograms. And the external dimensions of the printer are 400 x 470 x 680 mm. This should be taken into account when preparing the workplace.

Inside the printer, apart from the printing platform and the tub, which is already in place, we find a box with everything we need for work. The package of the printer is standard and does not differ from other Phrozen photopolymer printers.

A small paper manual which describes the procedure of the first start up and the minimum settings of the slicer. The warranty card. In a separate bag there are two handles with screws and hex, you need to screw them to the doors yourself.

Sandisk 8GB USB flash drive. A small plastic funnel for draining the resin. Considering how much resin is used with this printer, this funnel looks like crap, but let it be. A pair of rubber gloves. A few Phrozen stickers, purely decorative. A plastic spatula for mixing the resin in the tub and a metal spatula for removing the models from the platform. Instead of the former, it is advisable to use a silicone one, so as not to scratch the film in the bathtub. And instead of the second one you’d better buy a wider spatula and sharpen it well, otherwise it will be of little use. And the last thing in the box is a power cord, or rather two, for different outlets.
The printer is a metal cabinet of pretty impressive size.

It has two L-shaped hinged doors with UV-proof plastic windows that open from the front. The hinges on the doors are closer to the back wall, so when you open them, you have easy access to the print area from almost all sides.

The only thing to keep in mind is that you need quite a bit of space on the sides of the printer to open these doors. Inside, at first glance, we don’t see anything special. Quite the usual design for MSLA printers. Except that everything here is huge. The printing area is 330 x 185 x 400 mm, which is even larger than many FDM 3D printers.

Here’s a comparison of the Phrozen Mega 8K printer next to the popular Elegoo Mars 2 Pro mid-size photopolymer. The difference is simply phenomenal. It seems like the entire Mars would fit into the Mega 8K printing area.

Here is a comparison of the Phrozen Mega 8K printer next to the popular mid-size Elegoo Mars 2 Pro photopolymer. The difference is phenomenal. It seems that the entire Mars would fit into the Mega 8K printing area.

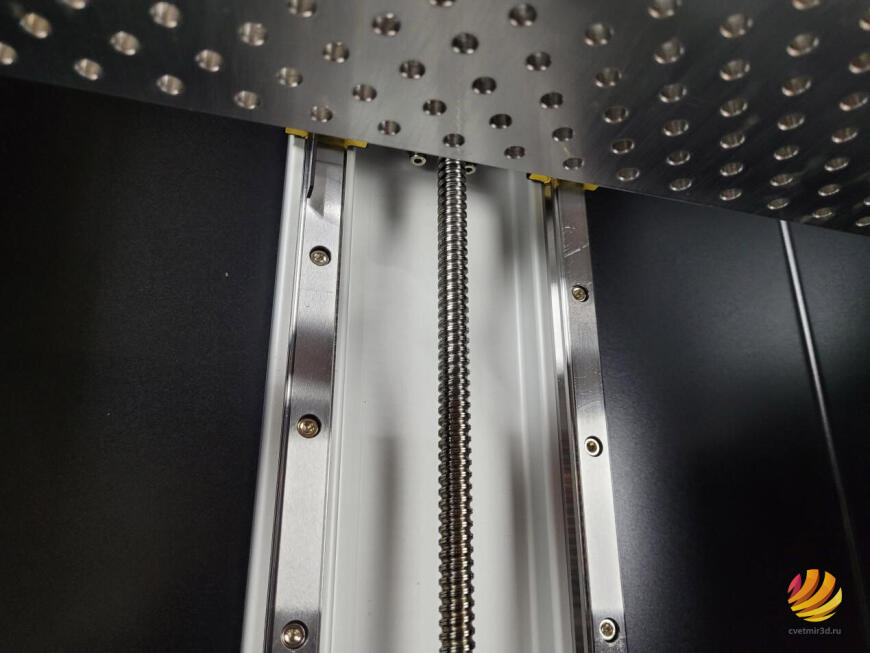
The Z-axis is moved on two MGN15 rails via a ball screw gear, by a motor that is hidden at the bottom of the enclosure. That should be enough to handle the breakaway force of this printing area.
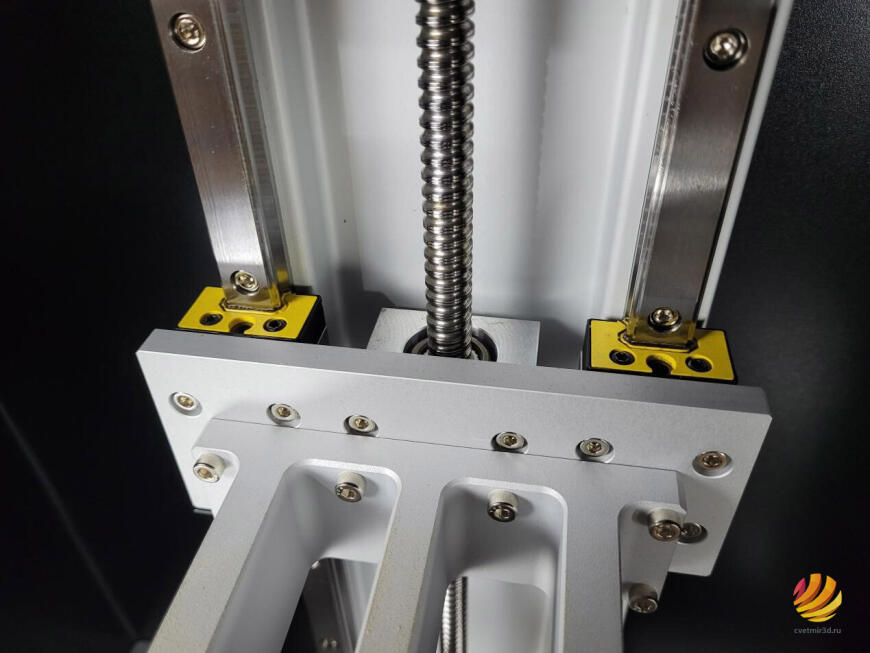
The optical stopper is on the bottom.

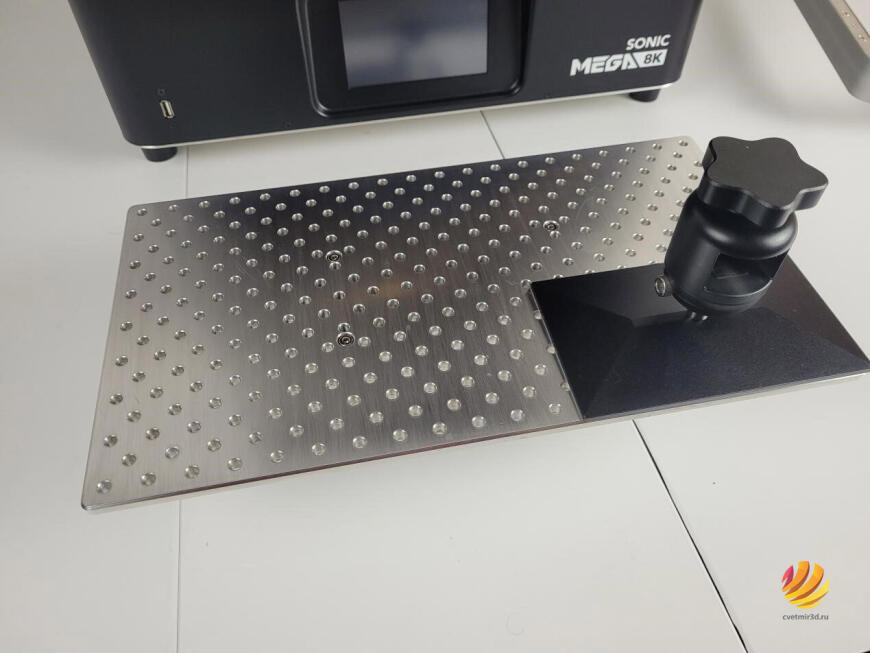
The printing platform is made of a single piece of 9mm aluminum and has a lot of holes all over the plane.

It used to be thought that a perforated platform in a photopolymer printer should greatly improve adhesion, but lately, most manufacturers have stopped using perforated platforms, even on large printers. There are pros and cons to this solution, but more on that later.

The calibration of the printer is a bit different than what we usually see. Here the platform is not just pressed down with a few screws, but has 4 locking screws and 4 fixing screws. We have seen a similar system on the Wanhao GR1 printer.


The bottom line is that the manufacturer does not imply that the user has to touch this calibration at all. The printer should already be calibrated from the factory. But, as they say, trust but verify. We will not show you how to calibrate and check it with this printer. But there is a separate video on the Phrozen Youtube channel with a description of this procedure. The platform is fixed on the carriage with two thumbscrews. And it has two handles on the sides, which is very useful, because both the platform itself and the models that can hang on it get pretty heavy.

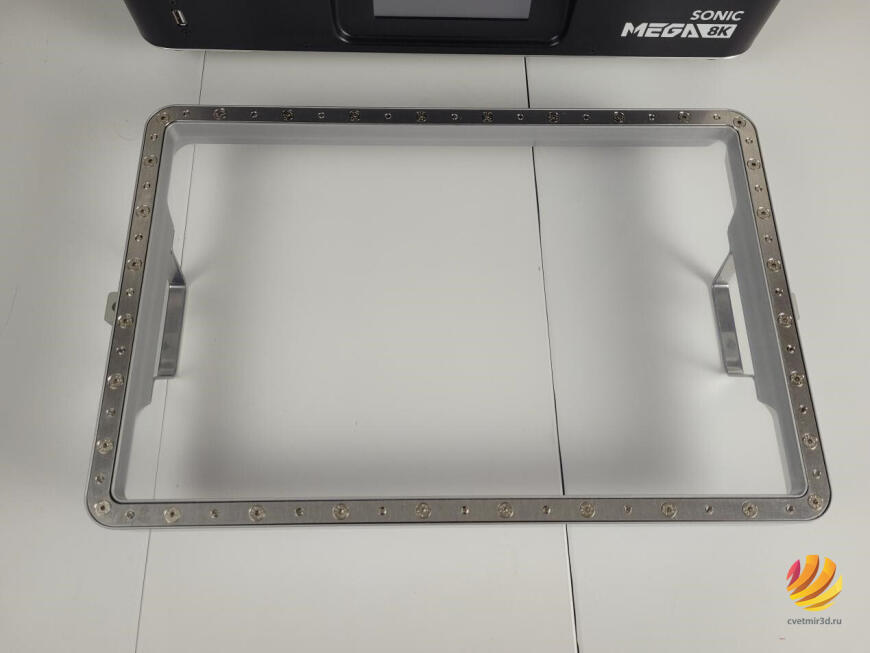
The photopolymer tub is generally no different than the tubs on smaller printers. Except that it’s huge and has two handles on each side, too.

It’s made of aluminum, and the surface is quite smooth, with almost no resin lingering on it and no lint left on the surface when wiped with paper towels. In one of the corners there is a small cutout for drainage of the resin, it is true small and does not give much, but it will not be superfluous. On the back wall there is a mark MAX, above which the resin can not be poured. The tub is fixed with two screws on the sides.


Under the tub we see perhaps the main distinguishing feature of this printer, it’s a huge 15 inch monochrome LCD panel with 8K resolution, 7,680 by 4,320 pixels.

Including the diagonal, each pixel is only 43 micrometers in size. That’s certainly not the smallest pixels a photopolymer can have. But considering the size, at this point, it’s very impressive.

And the fact that the LCD panel is monochrome allows you to light up layers quickly, and it also has a much longer life than RGB panels.
The already standard and well-proven LED system with lenses – ParaLED 3.0 – is used as backlighting. Backlight wave, as usual, 405 nm. That is, you can safely use any resin for MSLA photopolymer.

We decided not to disassemble the printer to see the electronic stuffing, but it is definitely worth noting that the installed control board and its firmware from the company Chitu.

This name sounds familiar to you for a reason, as the same company produces one of the most popular photopolymer printer slicers – Chitubox. And consequently, the Mega 8K is optimized to work with this slicer and can use all its features and new functions.

That doesn’t mean you’re limited to just one Chitubox. Other popular slicers such as Lychee or Formare are also supported. However, only with the Chitu branded slicer you can use the latest features supported by this board and firmware. For our tests we used the free version of Chitubox version 1.9.0.
To control the printer, there is a touch screen on the front panel. The menu is the same as for most Phrozen printers. All the necessary functions are there: calibration and manual moving of axes; checking the backlighting and the function of backlighting the remaining resin; information, printing menu, network settings.

Everything is familiar, functional and moderately laconic. During printing, it is possible to change the backlight settings. The screen sensor works well, everything clicks clearly, no false positives were noticed.
You can print from a USB-flash drive, the port for which is on the left side of the screen.

Or, you can connect the printer to your local network with an Ethernet cable and transfer files to the printer directly from your computer.

Transferring files over the network is not very fast, and considering that on a large printer and models will be printed large and also in high resolution, the sliced files are quite voluminous. Sometimes they can reach a gigabyte. It is not reasonable to transfer such files over the network, it is much faster to throw the file on a flash drive and run the print directly on the printer.

That’s all the information we can tell you about this printer just by looking it over and looking at the specifications. Basically, a regular MSLA printer, just huge and adapted to that size. The only things missing are air filtration and maybe a heater to keep it at a comfortable temperature for printing. Not that this is necessary, but it would be handy.
Let’s prepare the printer for printing. After checking the calibration and operability of the spotlight and screen, the slicer can be set up. We click on the add printer button in the settings, select it from the list and it’s done.

All the basic settings such as screen resolution and print area size are already set up.

The lighting times and travel speeds for some of the resins are already in the ready presets too.

We will be using the high-resolution modeling resin Phrozen Aqua Gray 4K. We already have a profile to print with this resin with a layer height of 0.05mm. Despite this, it makes sense to print a couple of tests to make sure that on a particular printer with a particular resin the settings will work. In our case, we ended up with a light-up time setting of 60 seconds for the first layers and 3 seconds for all others.

In addition, we played around a bit with the platform speed settings between layers. This is just one of the features of the Chitu firmware. It’s called TSMC – Two Stage Motion Control. This feature allows you to set two speeds for platform up and two speeds for platform down, both on the first layers and beyond.

We picked these settings with the risk of the models peeling off the platform in mind; print speed was not the primary concern. However, if you take some time and play around with these settings, you can still increase the print speed. You can see how to use and configure this feature in the instructions on the Phrozen website.
For the first test we decided to print something small. One of the most popular test models for photopolymers, the rook. But we didn’t want to print it alone on such a huge printer, so we put 4 pieces in different areas of the platform. Let’s check the calibration at the same time.

Despite the fact that the models are small, we have to pour a lot of resin into the tub. It takes at least half a liter of resin to at least cover the surface of the film. And you have to pour at least a liter to do a full print. Sometimes you even have to pour resin when printing large models.

Started printing and immediately encountered one of the pros of the perforated platform. Usually, when printing on a photopolymer printer, the first couple of hours there is no way to see if the model is glued to the platform or not. You can tell only by the sound of the model peeling from the film in the tub. Here you can almost immediately see that some of the holes have remained closed and no resin is dripping from them. This means that the model is glued to the platform from below.

Given the volumes of resin and the difficulty of cleaning the printer, this property of the perforated platform can save you a lot of time.
On the other hand, the disadvantage of this platform also became apparent. Because it’s flat, the resin left on top doesn’t drain off anywhere. And it makes sense to clean it off carefully the moment the platform stops sinking into the resin. Otherwise, you’ll have to wait a long time to drain it into the tub when you’re done printing, and as it drips from above, it can leave a splash on the printer’s body. You don’t have to do this, but it certainly won’t make things worse.

And so, after a couple of hours, we got 4 rooks. They were printed directly on the platform. It was a bit risky because the models are small and it’s not clear where the holes in the platform would be, but we were lucky, all 4 rooks didn’t peel off and at the same time separated from the platform normally.

In terms of quality, there are no questions at all. The layers are laid evenly, the detail is at a very high level, and given the size of the printer, just great. There is practically no pixelation of the screen.

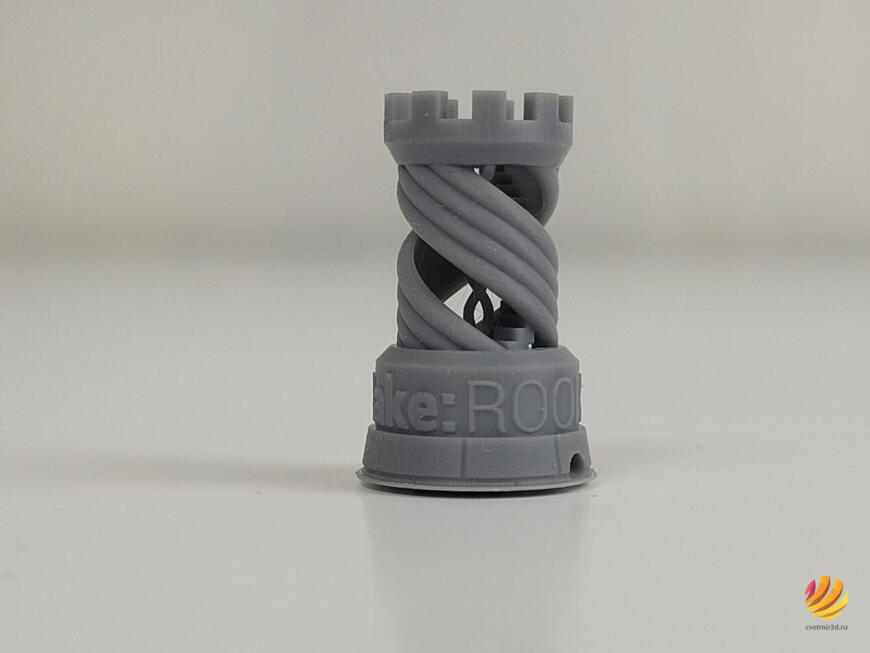

All the letters printed clearly, the overhangs are flat, and the small elements are in place. The result is great. The only thing that is a bit annoying is the bulges due to the perforated platform, which clearly stand out on the bottom surface.

It is for this reason that the vast majority of the time you will be printing on supports with this printer. You can print directly on the platform, but the bottom layer will always be in those bulges.

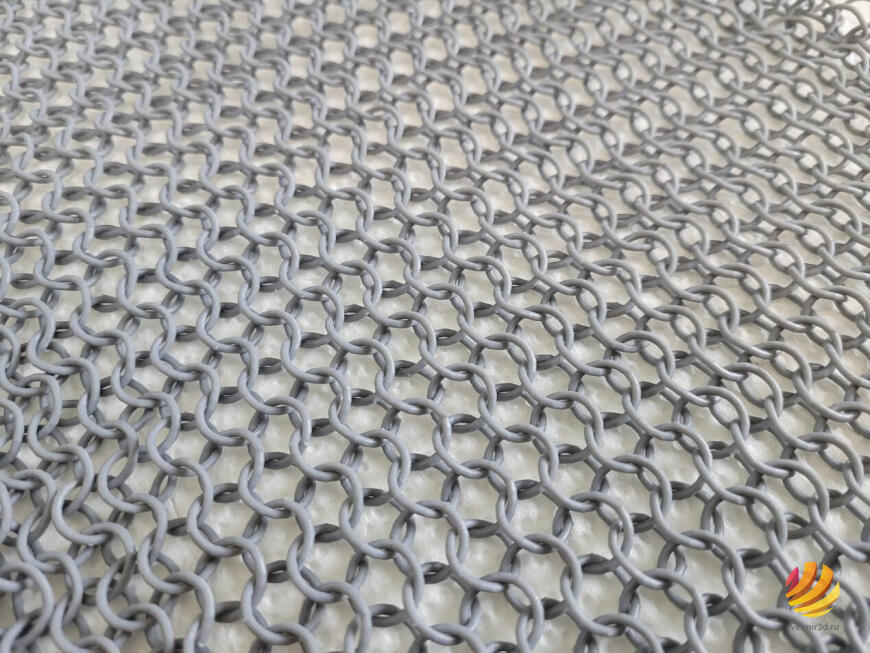
The second test we decided to check the evenness of the light across the entire print area. It happens that in the corners the light from the spotlight hits the screen less, and the resin cures worse in these places than in the center. For this test, we took a ring model from the Thangs website.

It is a huge number of rings intertwined with each other. Each ring is supported by one small support, and the supports are in turn connected in small lines.

Aside from the uniformity of illumination, there’s a lot that can go wrong here, just enough for one ring to break away from its support and all the nearby elements can get damaged.
Unfortunately, that’s what happened to us.

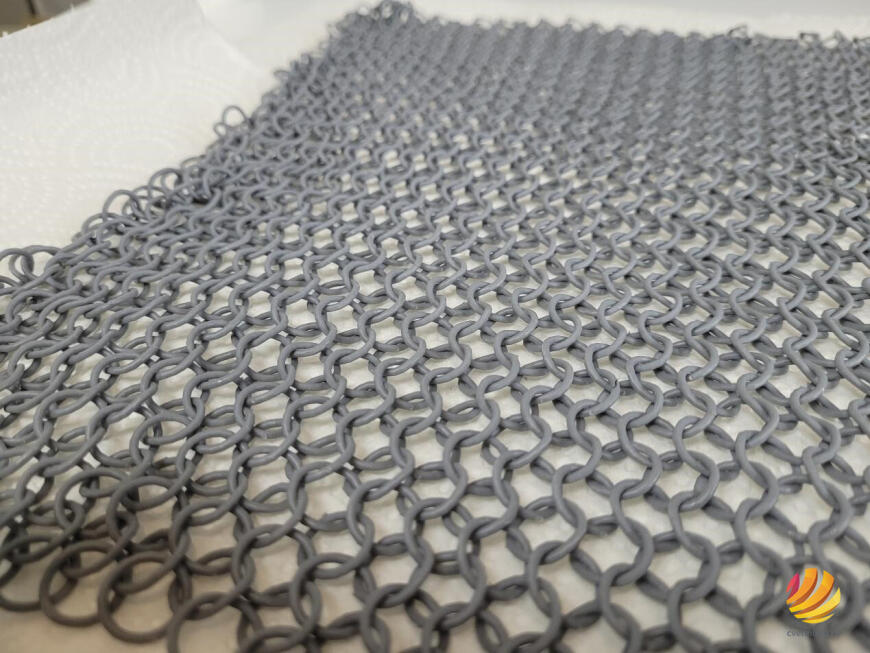
At one point a couple of rings broke off from the supports and damaged several rings nearby, while the supports at this point printed fine and did not peel off from the platform. The rest of the chainmail turned out fine as well.

All rings are in place at the edges and corners, they are all even, they are not glued to each other. After rinsing and reflashing, we got this kind of ring cloth. It feels very nice, too bad it’s not completely intact.

Because of the damaged rings, it was not possible to continue printing immediately after this one. Fragments that broke off could have stayed in the resin and damaged the tub film or even the screen. So I had to drain and filter all the resin and wash the platform and tub before the next print. Honestly, this is the most negative experience associated with this printer. For these procedures you will definitely need a well-ventilated room, a pile of alcohol, a mountain of paper towels, a respirator, good rubber gloves, a big enough basin, a funnel, and filters. Also can help a lot ordinary paint brushes, as long as they are soft and resistant to alcohol.

Most importantly, it takes a lot of time. It takes at least an hour to carefully drain and rinse everything. And if you still need to remove the model, remove the support from it, and rinse it out, it can take a couple of hours.
If using conventional photopolymer like Anycubic Photon or Elegoo Mars seemed like a hassle and messy experience. After the Mega 8K, it will seem like child’s play. This is serious stuff.
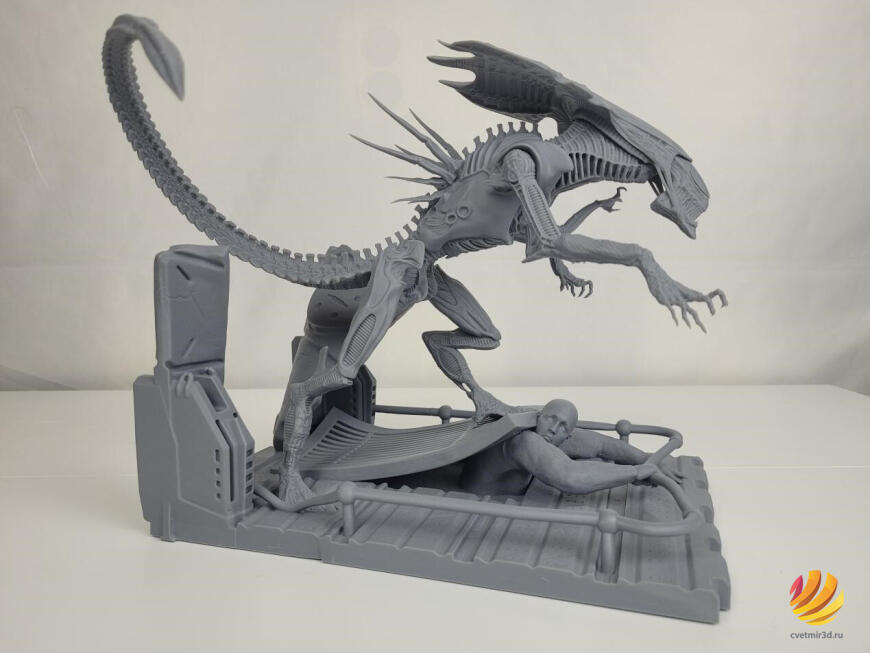
After a complete printer flush, we decided to print something really big and pretty. This is a model from malix3design.com. They have a lot of highly detailed models of movie characters and game characters. There is a charge for the models, but it is a good price to pay for this quality. We decided to try to print a diorama with Alien and his victim.
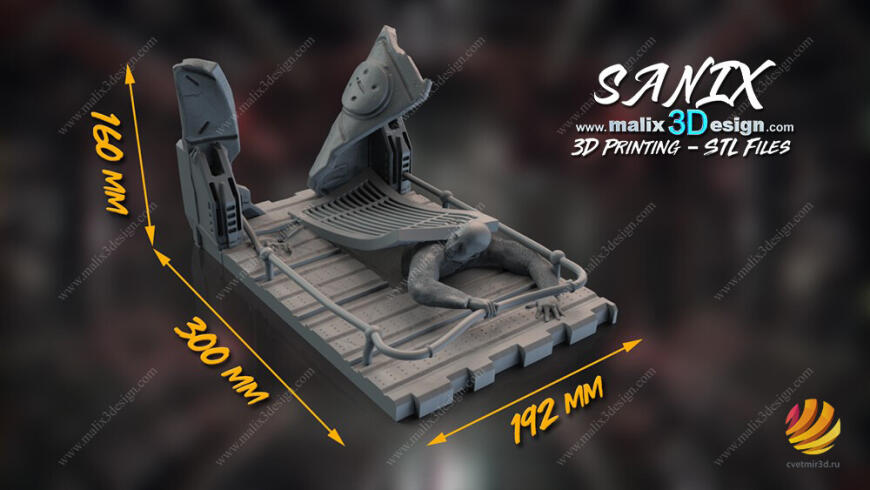

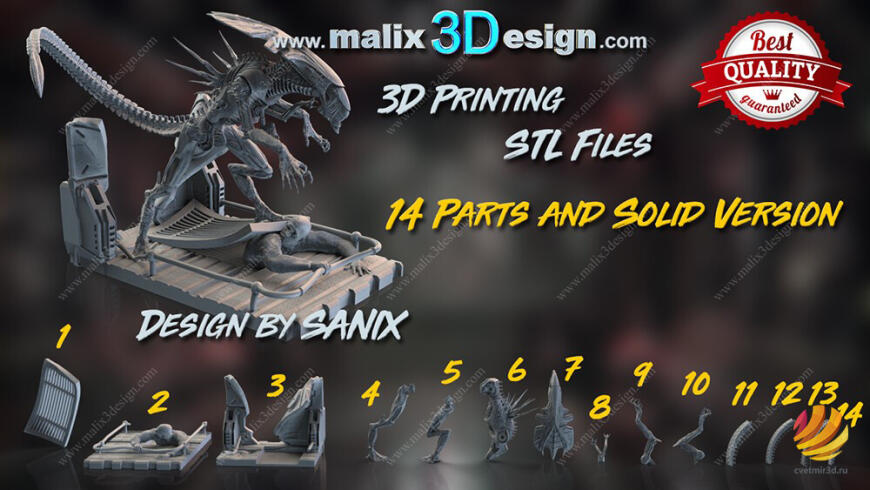
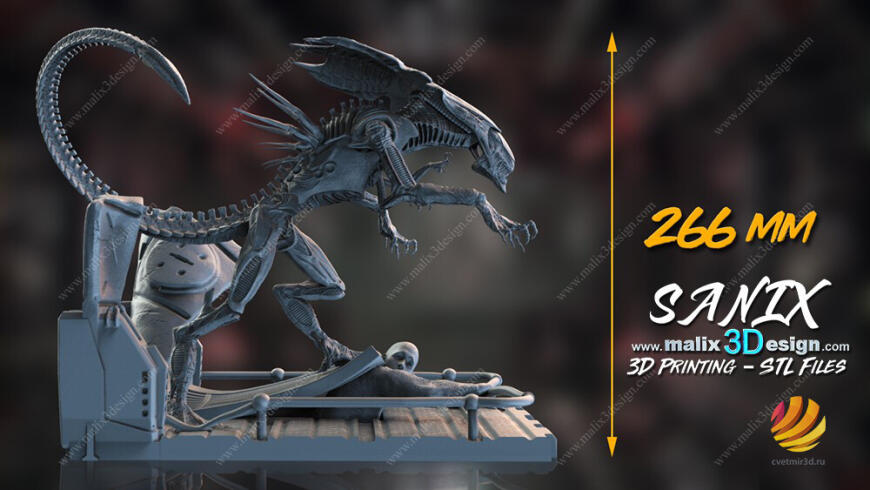
The model is big and complex. The whole model with its stand would not even fit in the printable area of this printer. But fortunately there is a version that is broken down into pieces.
We decided to print the Alien itself in its entirety, at a certain angle we managed to fit it on the platform, albeit tightly. Under the supports we added a raft just in case. The supports themselves turned out a lot, the model has a lot of small elements and details at different angles.

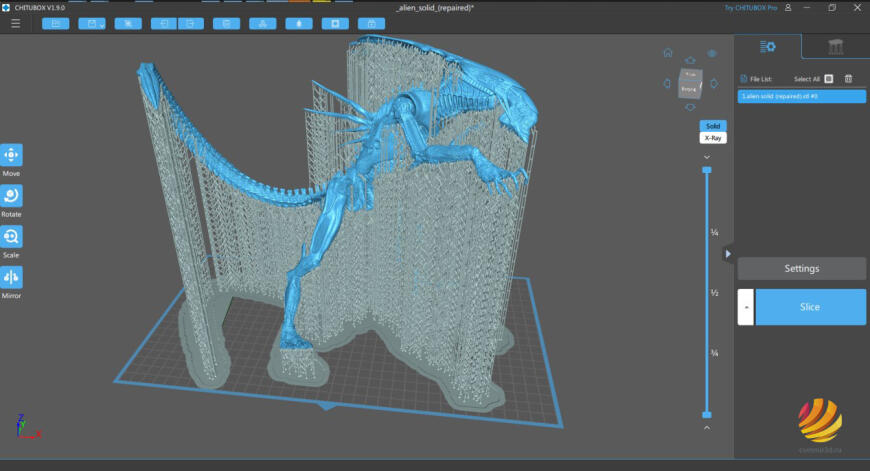
For the most part installed lightweight supports, in difficult places that start to print in the air, added medium for stability. Most likely, it would have been more economical and easier to print this model in parts, and even make some of the parts hollow. But the goal of this print was to test the printer under really challenging conditions.

The printing was successful, after 32 hours we saw the whole Alien on the platform.

A couple of the stand alone supports broke off while printing, but they didn’t affect anything. The bulk of the supports held up and did their job.

Getting Alien off the platform wasn’t very difficult. Next came the most dangerous adventure, to remove the support without damaging the model itself. We decided to do this before the wash.

Thanks to the lightweight supports, we were able to remove them almost everywhere simply with gloved hands. They left almost no residue. There are, of course, small dots, but on this model they are hardly noticeable. In a pinch, they can be removed in post-processing.
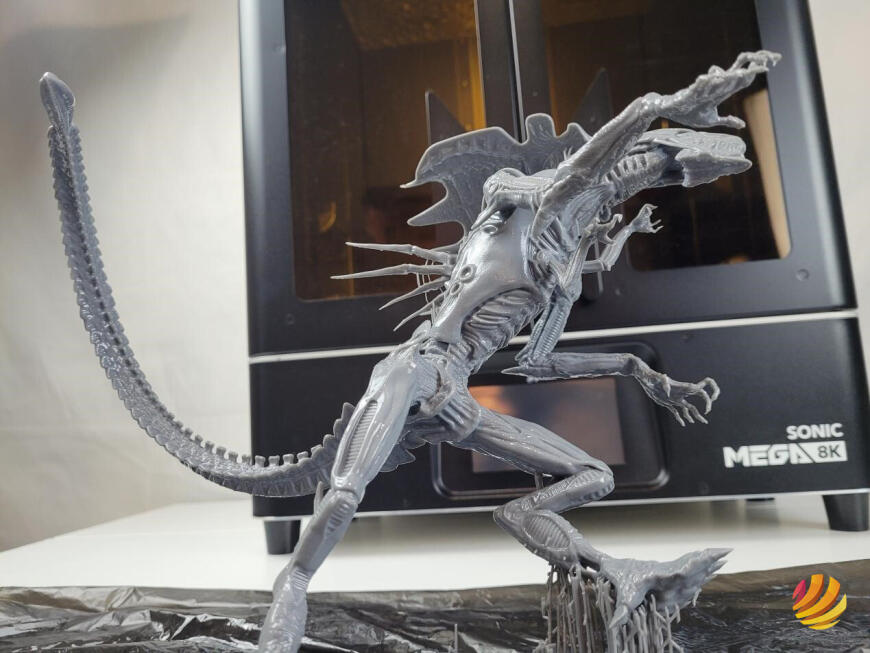
Rinsed the model well in alcohol, using a brush. Removed the remaining small supports from hard to reach places. And the result is this Alien.

To say it turned out well is nothing to say. The model is simply gorgeous. You can stare at it for hours. The detailing is phenomenal, the little details are countless. And everything is clearly printed. There’s not a single layer that’s bulging. The model has a couple of minor flaws, for example some of the fingers and claws are a bit loose from the supports, flattened. And also we have already mentioned traces from supports which are visible on smooth areas. But all this is a trifle, considering the overall complexity of the model. And it’s not the printer’s fault, of course.


Sent Alien off for a refresher and got busy printing the rest of the pieces. There were 3 of them. 2 parts of the platform with the frightened man and separately the grid with which this man is pinned.

Sent the most of the platform to print.

This too was printed for over 24 hours, also on a huge number of supports at an incline. So that the areas that would be visible would have as few traces of the supports as possible.

Well what can I say, even though the model is quite flat against the film in the tub, the model turned out quite even. Again, there are no protruding layers, bent corners, or misalignments.

Also rinsed, left to shine, and put the remaining two parts to print.

Overall they turned out well too, although the second part of the platform started printing from places that should later be glued together. And they turned out a little distorted in geometry, the supports didn’t hold up a bit. This part had to be sanded down a bit after printing.
For gluing we decided to use another interesting device from Phrozen, the Cure Beam.

In fact, this is an ultraviolet flashlight, adapted for the afterglow of photopolymer models. We had a separate video about it on our channel. In short, there is nothing outstanding in it, but it is convenient to use.


The essence of model gluing with resin is to drop some liquid resin into the glued area.

Wipe off any excess.

After that, light the place with a UV flashlight for a few tens of seconds.

If the gaps between the parts are large, the procedure must be repeated until the desired result is obtained. The models are practically soldered together. The only thing to be prepared for is that the poured and lightened resin shines much harder than the rest of the printed model. Therefore, the seam may be visible under certain lighting.
On the other hand, if the model implies post-processing and painting, all these places will eventually be hidden under a layer of paint.
After gluing and a little processing of the seams, we got an Alien like this.

The diorama is very nice, yet it is weighty and feels solid. True, there are, so to speak, deviations from canon. Let’s not go into the details of the Alien life cycle, but in a good way – this is the Queen of Aliens, and she should be 2-2.5 times taller than a human, but here she is not much bigger than an ordinary infantryman. Anyway, it’s all a pickle.

Let’s draw conclusions. Phrozen Mega 8K is an excellent printer in its class. Huge print area, monochrome screen with 8K resolution, fairly reliable mechanics that can handle really difficult tasks. A simple, yet functional and stable control board with firmware. What is missing is air filtration and a heater for the printing area.
The drawbacks for the most part are not related to the printer, but to the technology of photopolymer printing in general. The Mega 8K is really hard and expensive to work with. You need a lot of resin and consumables. A specially equipped room, since you need a lot of space and good ventilation. Lots of time for the seemingly routine procedures of draining resin or flushing the printer.
But if you need to print large, detailed models and are willing to put up with the hassle, this printer is definitely for you. With the right approach, it can work around the clock and produce really great quality parts.


